Part-5 Caring For Your Garden. How To Be A Gardener? Uses Of Garden Hand Tools.
Part-5 Caring For Your Garden. How To Be A Gardener? Uses Of Garden Hand Tools.
Garden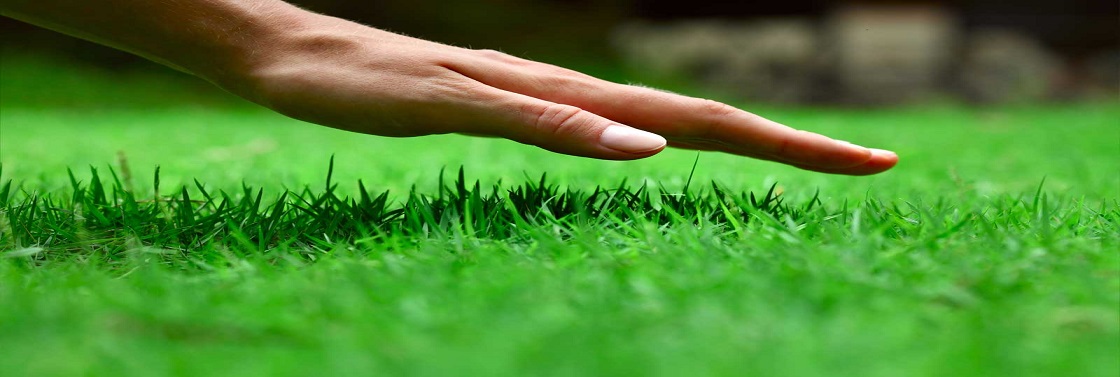 Indication
CARING FOR YOUR GARDEN
 1.Garden Tools
 2.Watering
   1.Successful Watering
   2.Watering Equipment
   3.Storing Water
 3.Feeding
   1.Fertilisers
   2.Types Of Feed
 4.Prunning
   1.Stoping & Deadheading
   2.Clipping & Trimming
   3.Tools For Prunning
   4.How To Prune Spring
     Flowering Shrubs
1. Garden Tools
1. Garden Spade
An initial is your basic digging execution; Use it to make holes and dig out sandy or white clay.
2. Garden Fork
The soil is perfect for digging, such as clay, or stony; Moving and spreading organic matter; And breaking the clay cottage.
3. Garden Hoe
Hips are for weed – cutting down weeds in the bottom of the soil surface and in half. This will kill annual weeds and weaken perennial ones. To kill perennial weeds, you need to find their roots.
4. Garden Rake
A garden rake – Use short, parallel metal tones (tooth) – for the final soil levelling and making ’tilth’ – soil surface for fine, sowing/planting.
Use a rake – a wide fan of fountain wire or rubber tones – from lawn to leaves/clipping and gravel roads.
5. Garden Trowel
Perfect for tinkering with weeds, shrubs, plantations and pots on a patio. The stainless steel drill is the best and it likes which looks comfortable.
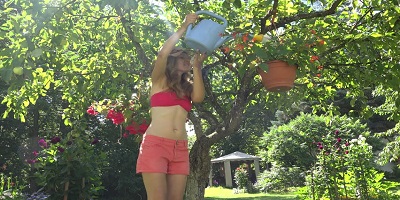
6. Garden Watering Can
To water and apply liquid fertilizers – make sure it is easy to fill and comfortable. And if you are going to apply WadeKilner, you can buy a different colour, and you can write the word ‘Weedkiller’ on it to avoid confusion!
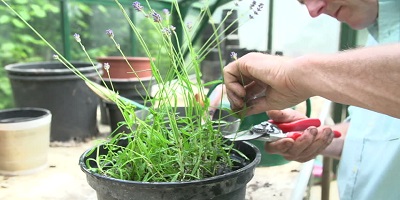
Remember, an outdoor tape is a great time saver, and if you get many plants to have a hosepipe in water.7. Garden Secateurs
Your original instrument for pruning, cuttings, and trimming is 1.5 cm To 2 cm (0.6 to 0.8 inches) thick.
There are two types: ‘bypass’ – two sharp blades cross each other like scissors; ‘Evil’ – are cut on a sharp blade flattened base. I like the past, but it’s a personal choice.
2. Watering
Plants always lose water through their leaves. It is necessary to ensure that the original is enough to fill, otherwise, it will die. In hot weather, the water is filled with soil by evaporation, so animals will need to be more often.
This makes one of the most important maintenance tasks, and that should be done on a regular basis, especially in the summer when it is hot and plants eat water faster.
Take special care in new planting or planting plants and containers – They get out of the water much faster than the plants established in the bedside, which have large root systems and more of the soil from which ‘collected’ water is.
1. Successful Watering
Use your senses to tell you when you need to water:
1. Look
If the manure appears to be pale, it is removed from the container side, or if the plant is dry and drowsy, it already emphasizes seriously and needs immediate watering.
2.Listen
Tap pottery pots with the length of the broom handle. A dry ‘cloth’ means enough moisture for fertilizer; Clear ‘ring’ means it is dry, so get watering.
3. Touch
Put a finger on the manure. If it sounds humid, but not too stupid, like a roan flannel, it’s all right. If it feels dry, water at once.
Pick up the pot – if it feels a light, it needs watering. If the plants get very dry in the containers, they pay them to stand in a bucket or are similar, so that they can be filled with water in the fertilizer. This can be a better way than watering the cans because the water will run in dry fodder directly and around, where it shrinks away from the pot.
2. Watering Equipment
1. Watering Cans
Hand Voicing is the best because it lets you look good on all of your charges. If you see any problems you will be able to sort them out before becoming serious.
Water-Can allows you to apply water at the place you need, and you can add liquid or soluble fertilizer and do two jobs at the same time.
Plastic cans are cheap and lightweight, aluminium remains heavy but for a long time.
2. Hose
Watering by hand with a hose is just like a can, but you will save water carrying! To make a full spray (a ‘rose’) for planting, you can also attach fatty rotors, adapters, lanes for stuck baskets, etc. The best hose professional Renaffersford is 25 mm (1 in) bore pipes – it’s not weird!
Remember to check your local water company whether you need a tube license and if there is a hosepipe restriction functioning.
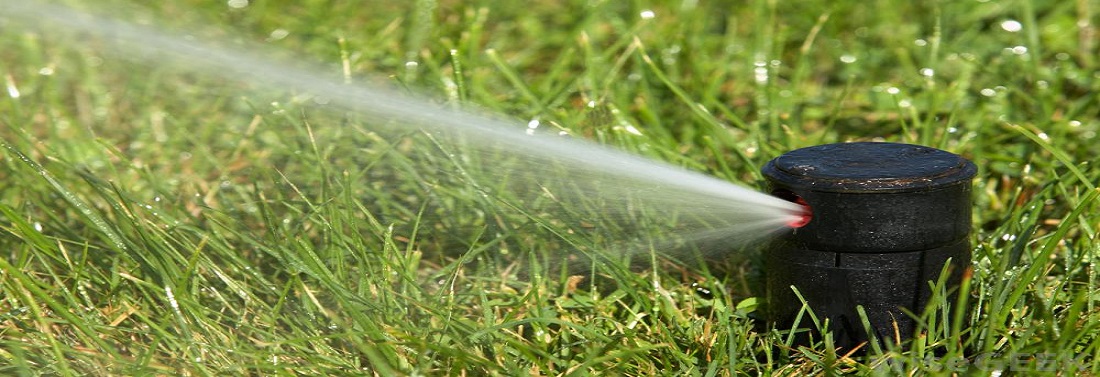
3. Irrigation Systems
Automatic systems are especially good if you have more plants that you can water in a reasonable time.
4. Perforated Pipe
The amount of plastic tubes with small holes through which the water slowly leaks out. Good for walking between vegetable rows or recently planted anniversaries. It is removed quickly even when it is no longer needed.A similar system is:
Seep Or Soak Hose
Flexible, porous hose is made from recycled rubber from the car tire, which can be buried in the ground, and left for a season or more.
Drip Irrigation
The modern irrigation system used by commercial growers. It can be equipped, so one or more drip guns deliver water to individual plants or containers (pipes can be buried). It is a very convenient system and can be designed to cover the size and shape of the garden. It’s also great for hanging in greenhouses and baskets.
Timers
To fully automate your irrigation system, fit the timer between the outdoor tape and pipework. This preset controls the flow of water in the program, and when you’re on holiday, you can become lifesaver (literally).
3. Storing Water
Water is a valuable tool, so save as much as you can by saving water from the water and reusing the water from the house. This is especially important if there is a restriction of the hosepipe.
1. Rain Water
Rainwater is free from chops, so if you’re increasingly mixing water with acidic plants, such as rhododendrons, hard water containers, rainwater.
2. Water Barrel
Always a good back up – collect and store rainwater from a downpipe in a barrel or wall-mounted butt.
3. Rain Diverter
Rainy delivery and a hose are used to move the collected water around the garden.
4.Capillary Matting
Capillary mating is a little bit more and it is usually used in greenhouses and conservatories, where you are standing pots on it. The straw sucks water from a reservoir of saved water, and suck it into the original pot. It’s great to park your home tenants when you go away.
3. Feeding
Why do We need To Feed?
To develop them healthily, plants absorb approximately 30 different nutrients from their roots and dissolved minerals in the water.
‘Big three’ are nitrogen (n), phosphorus (P) and potassium (k) – the letters in the brackets are their chemical symbols. Think of this as ‘meat and two vague’.
And then there are some small components, and there are 20 or more ingredients that are only needed in small amounts. Think of these as vitamins. They are all important for the plant.
In nature, as the leaves fall and the plants die, they rotate and return the nutrients to the soil, maintain a natural balance. However, we will reduce the natural soil of the nutrient reserves, which we naturally rot in gardeners by removing clippings, be mowing, be weeding and tedding and plant ‘bits’.
So, if we want our plants to grow bigger and strong, we are sure they are not ‘malnutrition’. And that’s where the fertilizer comes – it helps keep the nutrient’s soil full.
1. Fertilisers
Fertilizers are basically divided into two groups:
Organic
Natural resources such as plants, animals or naturally occurring rocks.
Inorganic
Man-made, manufactured ‘chemical’ feeds.
They do not care for the plants until they get their nutrients until they get enough, but in the view of the floor, there is an edge of organic fertilizers because they promote soil bacteria, which helps keep the soil healthy.
By law, it is necessary to tell on packaging in nitrogen, phosphorus and potassium fertilizers. So the packet label is 6: 4: 4, it means that every 100 grams of fertilizer contains 6 grams of nitrogen (n) and four grams of phosphorus (P) and potassium (K). Note that the order is always the same, that is, the NPK.
The N: P: K ratio also helps you choose the right fertilizer. If the ratio is the same, it is a common objective and it will help to increase all the rounds. If the high ratio of fertilizer is:
(1) Nitrogen: it will encourage leafy growth.
(2) Phosphorus: It will encourage root development.
(3) Potassium: it will encourage fruit and flower production.
2. Types Of Feed
1. Solid Feeds
Sprinkle broomsticks or powdered manure in thin and spring stripes and borders, and before planting or starting a new growing season, top-up soil nutrient level should be cut slightly. (It is often referred to as top dressing for dressing basis, applied to the ground and works before sowing or planting.)
Solid fertilizers must be dissolved before the nutrients are released, so that the soil is dry, then fill it well in water. The best time to feed bedding and borders is in the early spring before the growth of the plant.’Greedy’ plants like sweet peas, clematis, roses and vegetables will benefit from mid-summer ‘top-up’ – sprinkle fertilizers around plants and water. Do not worry about the food at the end of summer. This only encourages the late flush, which will hit hard through the frost.
2. Liquid & Soluble Feeds
Powder and fluid which is dissolved or dissolved in water are better suited for a plant in containers and pots. Nutrition is instantly accessible and is applied in an appropriate concentration. Hazardous business – How to work on a solid feed is a lot easier to work on. A Very very intensive solution will make and burn the original; Very little and the plants will be hungry!
Underwater dissolution / diluted instructions and amounts of containers and pots as a growing season once a week (unless instructions otherwise appear). The correct amount of application is that what you are pouring if you only water. Any extra pot will run out at the bottom. Do not eat plants that are wilted, always apply water first and wait until they rise again and are not floppy. Indoor plants benefit from feeding during the season, and sometimes during winter. High-level nitrogen feeds are best for leafy plants, and have anything with flowers or fruits for high potassium (potash) ones.
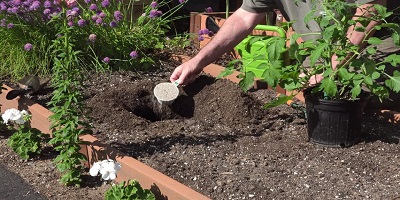
3. Slow Release Feeds
These are sticks or granules which dissolve very slowly for the release of nutrients for a long time. When the fertilizer is hot and humid, the most cunning only dissolve – time plants need the most food! Slow release feeds are the perfect answer if you are absent-minded, or irrigation mechanism. Mix slow-release feed granules with deficiencies when you are potting, or when you leave the top dressing out, add it to fresh manure.
Read the poke feed and instructions around the edge of the containers in the spring a few weeks after popping or in a few weeks! Large containers/plants require more sticks, some seasons and others will last only one or two months.
4. Pruning
What Is Pruning?
Pruning basically cuts carefully selected parts of the plant to restrict its size, to grow it in a certain shape, to encourage more fruit, flowers or stems, or to remove dead or diseased material.
Pruning is always seen as one of the ‘deep secrets’ of horticulture wherein ‘start’ is only when you become an ‘expert’.
But pruning is neither difficult or complicated, in fact, it is applying a lot in common sense! You only have to follow some guidelines and should check in a book that the plant needs to be harvested. Many plants are often adequate to remove dead, diseased, broken, crossing and crowded branches. You can not know everything about gardening, so you should never be ashamed to test any facts in the book. I am doing all that. To find a good range of books for beginner gardeners, visit the More section.
1. Stopping And Deadheading
Stopping
Some plants that naturally grow the main stems. for example, the pelargonium, it can be brittle by ‘preventing’.When a small plant is 5cm to 7cm (2in to 3in) high, pick up the tip of the stem. It promotes the development of side buds, which make plants bush.
With some plants, for example, the future will break the bush down after the new set of shoots stop the first set.
Deadheading
Deadheading really means that you’re stopping the plant from doing whatever you want – set seeds. But do that, and they are trying to produce a flower after flowering. In fact, with regular deadheading, you can keep bedding, patio plants, and early flowering flower roses from early summer to autumn.So, How Do You Deadhead?
• For long-standing stems of flowers in one-headed plants, for example, Pelargonium, it cleanses the entire head of the flower and the stem, where it grows from the main stem.
• Remove the dead head in your fingers for a plant with many shorter flowering flowers (for example, Fuscia and Petunias), remove the stems as much as possible.
• Plants with small flowering people. for example, Alice – forget it!
• Bulbs – Snap leaving the only snake left behind the deadhead.
• Roses – Use from the sacket and from 15 centimetres to 25 cm Remove from the strain with deadhead on the joint of the leaf (6 to 10 pm).
And When Should You Do It?
When the flower is brown, the flower begins to grow.
2. Clipping And Trimming
In principle, this affects the futures by taking out the shooter tips, the stalk given below comes out, thus making the hedge thicker. Clipping allows you to shape a hedge or a basket.
The skill is to decide when to do so that you reduce the amount you have!
Leafy Formal Hedges
Formal hedges, such as the top and leaves, beaches and conifer, need to be clipped twice a year (June and again in late August) if you want them to be fully searched. However, wait a little while during the summer if you do not take into account your hedges, you can cut off in late August.
Clip mini hedges are used in a dwarf box to understand the boundaries and tumours in May.Fast-growing Formal Rescue Clip, for example, private, from May to September every six weeks.
Tools For Clipping And Trimming
• Hedge trimmers (electric or petrol) for rescue hedges and big topiary.
• The lumber graves or top-level fountains, on the one hand, definitely need to break down the building and make a border.
• Centers for large-leaved hedges, such as Laurel, whose panda will be scratched by wrists or hedge trimmers.
Clipping Technique
Clip a hedge so that the slopes next to it are very slight. It is called ‘batter’ and the hedge is top-heavy and split open. It also makes it look nice. Start at the bottom and get your Ember / Hedge-Trimmer slightly from the inside and just follow the above line.Use CDs, specialized platforms and residual current devices (RCDs) where appropriate. It’s easier than thought by the electric cable, you think!
Pruning Trees And Shrubs
Some plants do not need to be pruned, whereas others like roses, some clematis and spring-flower shrubs require an annual haircut. There are some direct dos and don’ts available.
Where To Cut
Do: Cut a leaf or about 5 mm on a ‘bud’. That’s where the next shoot will grow.
Do: Just penalize a bud which comes in the direction of the face that you want to grow in new shoots – usually outside and/or above.
Do: Cut off an angle that slowly removes the slope from a bud; Pieces cut straight from the buds. This reduces the risk of infection.
Do: Remember that you usually promote winter plants, encourage more.
Don’t: Cut so that you can damage the control, or is so far away that you will be left with a small dead stub.
3. Tools For Pruning
Secateurs
1.5 cm to 2 cm in diameter (0.6 to 0.8 inches). Keep them sharp and clean the saddle when you finish using them.
Long-Handled Loppers
Secateurs on Steroids! Long handles give you more reach and more leverage to cut thick branches.
Pruning Saws
Use on branches and always cut so that no stunt is left from where it moves from another branch or from the trunk, where you leave the ‘collar’ round on the base of the branch. This encourages the bark to grow on the wound.
Long-Reach Pruners
Perfect if you have tall trees because they save on stairs. There are attachments to picking out some out of fruit!
How To Prune Spring Flowering Shrubs
The thumb rule for almost all plants with a wooden stem is:
Flowers from the middle of June, if the flowers are hit later in the spring; And if it is then flowers, cuttings at the end of winter or early spring. But always check the plant in a good plant guide.
Some floral shrubs, such as Philadelphus and Forsythia, become excessive and untidy until each year is cut. A waste plant also takes better than one to cut the many spaces and flowers.Pruning, such as small plantations, is basically a large-scale deadheading! As soon as the flowers come, cutting all the sticks carrying dead flowers.
As long as you do not make any dead flowers on a young side, come down the stem and cut it from where it grows from the main branch.Do it regularly every year and your spring shrubs will remain neutral and will take many more flowers. And for summer flower shrubs, this technique is basically the same, only time is different.
Next, it is possible to erupt a possible outbreak of pests and diseases. I will show you how to stop and control the garden thugs – so that you can at least try to keep your garden in tip-top condition.