Part-4 Practical Planting. How To Be A Gardener? Uses Of Garden Hand Tools.
Part-4 Practical Planting. How To Be A Gardener? Uses Of Garden Hand Tools.
Practical Planting Indication
PRACTICAL PLANTING
 1.Preparing The Ground
   1.Improving Your Soil
   2.Digging
   3.How To Dig
 2.Buying Plants
   1.Choosing Healthy Plants
   2.How To Read The Label
 3.Planting
   1.How To Plant
      In The Garden
   2.Variations On
      Planting Theme
   3.How To Plant
      In Containers
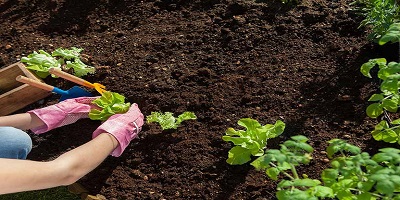
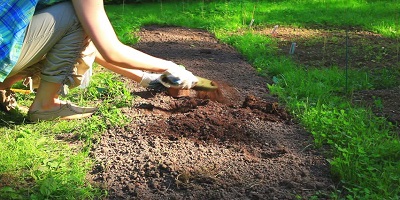
1. Preparing The Ground
Give a good start in life to provide a well-prepared, fertile soil for the plants.The amount of soil preparation will be based on what you are facing. You may have a garden in which lots of weeds are needed; Builders’ furnace potholes can be a topsoil level in your entire new garden, or you may want to remove the areas of the lawn to make room for more plants.
Whatever your view, therapy is the same – the elbow grease It may not be an attractive proposal, but, I think, once the garden is running and running, the time passed by doing ground work will give you sophistication in the lower maintenance.
The first step is to get rid of the garbage and to dump the tired old shrubs and weeds, especially perennial weeds, such as thistles, peanuts, bandwidths, ground elders and grasses from the couch. Remove all the parts of the roots: bits of rhizomes, nails and brickbats. But, do not be too hasty. Keep an eye out for live plants. This is particularly important during the winter when they can ‘rest’ under the ground. Let them grow, and bring them out if they are not good, but remember, they can become a real treasure.
1.1. Improving Your Soil
Preparing the soil is finished, it is time to improve the soil. Improvement of clay makes its texture and structure easier to grow in the roots and provide all the food with the need of vegetation.
It’s Two Stage Process:
• Soak many organic compounds like many grass manure or garden manure, half-a-square meter load per square meter.
• Fertilizer – Common organic fertilizers, such as blood, bone and fissile, helpful per square meter.
If you are starting afresh, first do excavation and jump in winter, especially if you are on the ground that is effective in clay, but does not worry if you miss it and just before harvesting a fork in the manure.If the plants are already there, 10 cm before the start of the large-scale organic and fertilizer scattering season. (4-inch) level bar ‘green grass’ starts.
1.1.1. Organic Matter
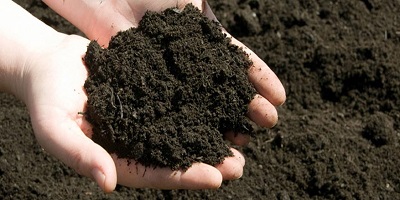
Organic matter improves soil structure, such as excavation, and breaks down because it releases few nutrients. It is the same that organic gardeners call ‘no vegetation to land’.You can buy ground inequality in the bag in the centre of the garden, but this is expensive. A better ‘steaming pile’ is thrown away, and making your own with a compost heap.
1.1.2. Manure
This can change in quality, which comes from it based on animal and farming. For example, manure is better than horse-mounted cows, where a little straw bed is used. Whatever the origin, it does not apply freshly – it releases ammonia that damages or kills the plant, it should be ‘mature’ for six months.
1.1.3. Leaf Mould
You can only get this if you are lucky enough to have a patch of forest in your garden, or if you can strip down many dark leaves, do not collect whatever you do, from the woods.
1.1.4. Composted Bark
This is the best thing in this leaf mould available in most of the garden centres. He looks like a coarse peat but has ‘humidity’ without moisture. Chipped peel (left in the picture) is usually used for mauling.
1.1.5. Mushroom Compost
Nowadays, it is based on the peat of the traditional horse race. Due to the chalk used in the mix, it is alkaline, but if your soil is not alkaline already, then mushroom fertilizer is not a bad source of organic matter. Checking your soil pH first is always a good idea.
1.1.6. Garden Compost
A very cheap and convenient alternative, and generally rich in nutrients, than other types of organic matter. Find out how to make a pillow with kitchen and garden waste, how to make yourself in the mound of manure.
1.1.7. Peat
Being worried about environmental damage due to drinking water extraction due to the Welland habitat is using responsible gardeners alternatives. Either way, Pete has almost no nutrients and it breaks rapidly.
1.1.8. Recycled Materials
There are all kinds of weird and wonderful concepts – nothing from County Council’s trash banknotes! A good idea is to call your council for details of their own recycling plans and keep an eye on what’s on offer at the garden centres.
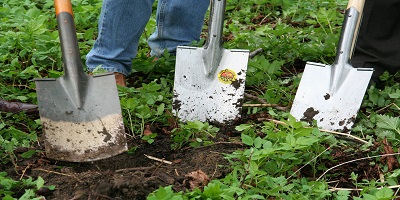
1.2. Digging
This is one of the most fundamental and hating jobs, although the chiropractor makes a fortune! So why should we do it? The production helps in controlling annual weeds (not in seeds). By pressing them (planting) in the soil, they remove the need for fertilizer and perennial weeds are extracted from clay. Plus, digging can be incredibly satisfying and gives you time to think!
Digging ‘fluffs up’ in ground compacted (scattered down) by heavy planting and rain. Fluffy soil needs water requirement, drains faster and the roots are easier to grow.
The tradition was that the ‘only’ method of digging a new bed ‘properly’ was to double-dig it. This is a lot of hard work that you do not have to do if you just want to decorate. The other name for that is ‘Bastard Trenching’, why would I explain to you …A good option is to find out “how to dig?”.
1.3. How To Dig?
Honestly, this ‘boiling water’ is not something, but it’s like learning to drive – learn better habits than ‘getting rid’ of bad things. So bear with me.
You Will Need
• An Initial Digging
• A Digging Thorn
• Well-Rotted Organic Matter
• General organic fertilizers such as blood, bones and fish mills.
And remember, to avoid stress, keep regular interruptions between the digging and keep it as low as possible while keeping it.
1. Remove perennial weeds and garbage.
2. Start from one part of the bed and about 25 cm with the width of the area. Dig deep (10 inches) wide. The pile that you have been dug in the other corner of the ground at the corner of the ground.
3. 7cm to 10cm (3in to 4in) level of organic matter at the bottom of the ditch with its length.
4. Working with your back toward the soil pile, the other 25 cm in the entire area. (10 inches) Digging large (dig deep in the beginning of a depth of only one spit) and close the soil of each clay so that it can turn upside down in the soil. First ditch, cover the fertilizer.
5. As you go, remove the roots of any perennial weed that you find.
6. So, when you reach the end of the row, you will first fill the dough and make another one below the plot 25 cm (10 in.).
7. Then, use the fork and crush any big earth bush below the volt-sized lumps.
8. Continue three to seven steps until you have dug the entire area and use original clay to fill your final expanse.
2. Buying Plants
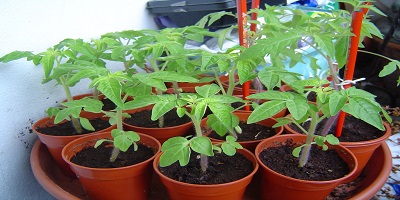
Due to plastic blossom, plants are grown, sold and finished planting year. There is nothing wrong with buying someone else’s labour and buying ready-grown plants. Visiting garden centres and especially nurseries will introduce you to new plants which you will not otherwise be able to come to.
Garden Centres
These days the garden centres are like department stores. The sale of the plant is just one aspect of their business. However, a good one ‘everyday’ plant will sell a fair range, and you can choose the best plants.
Nurseries
Generally, small businesses are run by enthusiasts that have special characteristics in speciality plants; alpines, clematis, old-fashioned perennials, herbs, roe rhododendron, and so on. Nurseries are the best places to buy unusual plants, and owners are often generous with their knowledge.
Online And Mail Order
Both options are becoming more popular and Internet experts are a great resource for finding nurseries. But you do not have to see what you ordered until you arrive. This is not a problem with a specialist nursery. It is a popular way of buying young plants (also known as ‘plugs’) which is easy and cheap to pack for mail.
2.1. Choosing Healthy Plants

2.2. How To Read The Label
After planting, most people put a plant label next to the plant, and this is a good idea, but timely labels will fade so that important plant statistics in your garden notebook for future reference records. And if you’re really smart, why not make a plant database?
Name: Latin And Common
Height: Average size after 5 years (will vary according to the conditions).
Spread: Average size after 5 years (will vary according to the conditions).
Flowering Time: Use month or month corresponding number.
Soil Type: Acid, Neutral And Alkaline.
Moisture: Moist, Well-drained and dry.
Light: Sun, Half sun or Shade.
Special Instruction: For example, how to do pruning time, how to preach.
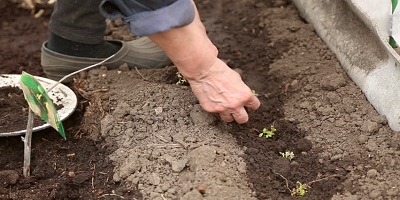
3. Planting
Follow the advice of the old garden, “Spend as much as you can on the hole as a plant” and you will not go wrong. Plants are planted in nurseries and expect similar treatment when you plant them in the garden. If you hit him in a small hole and ignore him, do not be surprised if he sulks and dies.
3.1. How To Plant In The Garden
This same technique works for a lot of plants, from a perennial alpine to 4th (13 ft) tree but there are some variations, as we will see.
You Will Need:
• A Spade
• A Fork
• Well-Rotted Organic Matter
• General organic fertilizers such as blood, bones and fish mills.
• Mulching Material
1. On the previous day, check the plant in its vessel, and if it is dry, then stand in a bucket of water overnight to give it a good drink.
2. If you have already prepared the clay, dig the hole about the double diameter of the pot, and deeper than one and a half times as the pot is high.If you are planted in a grass or new land where the land has not been cultivated well then sprinkle it for four to five times the diameter of the pot (but still one and a half times its height).Either, fill 15cm (6in) well on the bottom of the hole with the organic material and it thorn in the clay.
3.2. Variations On A Planting Theme
3.2.1. Alpines
Alpines need to be very freely drained in the ground, especially around their ‘neck’. Rootball is surrounded by 1.5 centimetres (0.5 in) high-level plant alpines and the level of horticultural grit or chippings. This drains very quickly, throws the weeds and looks attractive.
3.2.2. Bulbs
Bulbs need to be sown deeper than you think. The thumb rule has its own depth three times, so for 5cm (2in) daffodil bulbs, the hole is 15cm (6in) deep. But do not worry if you’ve done that wrong because bulbs will pull themselves into the right depth using the compressed roots.
Some bulbs need to be shallow sowing, for example, Madonna’s lotus, lily position, ‘nose’ above the ground.Protect the bulb from the wire mesh or stealing by the moon or squirrels by covering them with lots of dark leaves.
3.3.3. Clematis
Clematis needs to go deeper – the bottom of the root ball should be 10cm to 15cm (4in to 6in) below the ground surface. It keeps the roots cool and humid and helps recovery from Clematis Wilt.
3.3.4. Evergreens
Plant as ‘standard’, but keep them really well watered. The conifer has lots of leaf area, and if it is not well watered then it can absorb water loss faster than its roots. As a result, they are filled with their brown color.Other reasons for ‘scorch’ are strong winds and suns, so if you live in an open area, protect it with airiness.
3.3.5. Commonly Grafted Plants
Plants like fruit trees, some decorative trees and shrubs and roses are ‘skimmed’. A grafted plant is basically the two one – the origin of good gourd (rootstock) with a variety named on the top (scion). Grafting is done with the named varieties that do not grow from the seeds or are slow/difficult to cut from the cuttings.
The point where the rootstock and skyline join is the ‘union’ (stem size). To prevent scion rooting, the plant with the union at 15cm (6 inches) above the soil level. This will remove any green grass/manure from the instant trunk.Plants in pots should be already in the proper depth, so only the plant with the top of the root level at clay level.Roses are different, the rootstock enthusiasm is not the reason for making graft – the cost is! So, 2.5 cm with the land. (1 inch) plant with a union around.
3.3.6. Trees
Plant as usual, but for any part of its first winter, on any tree at 2m (6.6ft), This will give you the original time to install. The 1 meter 1.2 meter (3.3 to 3.9 ft) weapon is in the ground at the 45-degree corner near the rootball, pointing to the current wind. Fix the trunk in a 30 centimetre (1 foot) piece of soil with a single tie. If the rabbit is a problem, then secure the bark with a spiral tree guard filled with trunk after planting. Do not forget to leave the tie as the trunk grows.
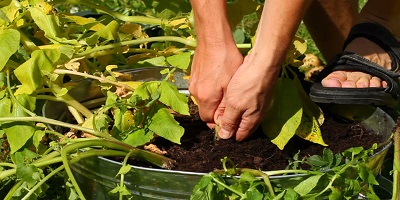
3.3. How To Plant In Containers
Planting in containers is a bit again because you have to supply the planting medium, and make sure that when it runs on top, instead of washing it in water.
You Will Need:
• Containers (All containers have drainage holes, if necessary, exercise some of them).
• Crocks (A broken pottery pot or bits of large stones).
• Gravel
• Potting or multipurpose compost – preferably peat-free.
• Mulch
1. Cover the base of the box with a layer of a jar (Ask in the centre of the garden – usually some broken pots) and cover the gravel with 5cm (2in) layer. This improves the drainage and prevents dust from the container.
2. Add adequate fertilizer so that it is 3cm (1in) below the root container rim of the rootball when standing on it. Make this 6cm (2 inches) if you want to put a stone chip or artificial green grass of small pebbles on top of the fertilizer. This will look attractive, help prevent weeds growth and moisture will reduce evaporation. It is better to use soft manure in a dry place. Unless you squeeze it, shake it until it connects with each other. After sowing it will absorb water better.
Potting or multipurpose fertilizer is suitable for most plants, but if the plants are acid-friendly, for example, rhododendrons (recall module 1) utilizes Ericasius fertilizer.For core, peel (and peat), we have less weight than loam-based ones. Both can be mixed with tops, leaf moulds or garden manure, but to make fertilizer use them, use manure mash to stop the fertilizer.
3. Remove the plant from its vessel and if the pot-bound makes the roots soft. Put them in a new pot and stand upright.
4. Gently leaving the distance of 3cm (1in) water around the roots of the generation.
5. Add small plants – you will need to dig excavation and make sure they are also 3cm (1in) below the rim. Put them on this green grass or just keep the plants in the water well – as long as you do not see the water coming out of the container. Do this stage, give water for drying in the manure.
In Part-5 you can find out how best to water your plants, feed them, and perform best with basic tips on pruning.